Basketball is a popular sport that is enjoyed by many people around the world. While most people are content with simply playing the game, others may be interested in creating their own basketballs. Making a basketball can be a fun and rewarding experience, but it requires some knowledge and skill.
To make a basketball, one needs to have the right materials and tools. These include a rubber bladder, leather or synthetic leather cover, adhesive, and a needle and thread. The process involves inflating the rubber bladder, cutting and stitching the cover, and attaching it to the bladder. While the process may seem straightforward, it can be challenging to get the right size and shape, as well as the right amount of air pressure. However, with some practice and patience, anyone can learn how to make a basketball.
Understanding the Basics of a Basketball
A basketball is a spherical ball used in the game of basketball. It is made up of several components, each of which plays an important role in the ball’s performance. Understanding the basics of a basketball is essential for anyone looking to make one.
Materials
Basketballs are typically made from rubber or synthetic materials, which are durable and provide good grip. The outer layer of the ball is made from a pebbled texture, which helps players grip the ball better. The inner layers are made from nylon or polyester, which provide strength and support.
Size and Weight
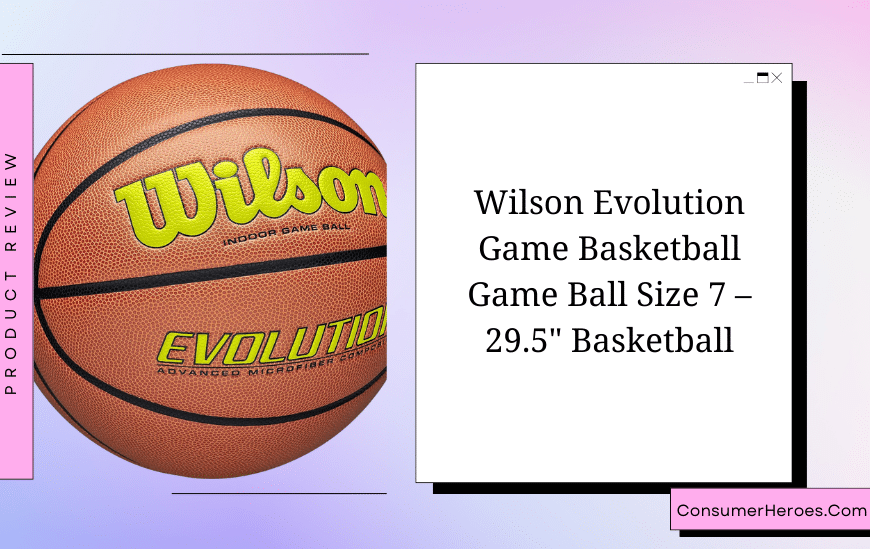
Basketballs come in different sizes and weights depending on the age and skill level of the players. The standard size for an NBA basketball is 29.5 inches in circumference and weighs between 20 and 22 ounces. Youth basketballs are smaller and lighter, typically measuring 27.5 inches in circumference and weighing between 16 and 18 ounces.
Inflation
Proper inflation is crucial for the performance of a basketball. Overinflated balls can be difficult to handle and can cause injuries, while underinflated balls can be too soft and bounce poorly. The recommended inflation pressure for a basketball is between 7.5 and 8.5 pounds per square inch (PSI).
Bounce
The bounce of a basketball is determined by its inflation, size, and weight. A properly inflated ball should bounce to a height of about 52 to 56 inches when dropped from a height of 6 feet. The surface on which the ball is bounced also affects its bounce, with hardwood floors providing the best bounce.
Conclusion
Understanding the basics of a basketball is essential for anyone looking to make one. The materials, size, weight, inflation, and bounce of a basketball all play important roles in its performance. By paying attention to these factors, you can create a ball that performs well and is safe to use.
Materials Needed
To make a basketball, there are several materials that are required. These include:
Rubber Bladder
This is the innermost part of the basketball, which is responsible for holding the air inside the ball. The bladder is usually made of rubber, and it comes in different sizes depending on the size of the ball being made.
Synthetic Leather
The outer layer of the basketball is made of synthetic leather, which is a type of plastic material that looks and feels like real leather. This material is used because it is durable and can withstand the wear and tear of playing basketball.
Thread
To hold the bladder and synthetic leather together, a strong thread is required. Nylon thread is commonly used because it is strong and durable.
Ink
The basketball needs to be marked with lines and logos, which is done using ink. The ink used is usually black, and it is specially designed to adhere to the synthetic leather surface of the ball.
Glue
Finally, glue is used to attach the synthetic leather to the bladder. A strong adhesive is required to ensure that the ball does not come apart during use.
Overall, making a basketball requires a combination of these materials, each of which plays an important role in creating a durable and high-quality ball.
Choosing the Right Leather
When it comes to making a basketball, choosing the right leather is crucial. The leather used for a basketball should be durable, high-quality, and able to withstand the wear and tear of the game.
There are several types of leather that can be used for a basketball, but the most common is full-grain leather. Full-grain leather is the highest quality leather available and is made from the top layer of the animal hide. This type of leather is strong, durable, and has a natural texture that provides excellent grip.
Another option is synthetic leather, which is made from a combination of materials such as polyurethane and nylon. Synthetic leather is often used for indoor basketballs as it provides a consistent feel and is less affected by changes in temperature and humidity.
When choosing the right leather for a basketball, it’s important to consider the intended use of the ball. If the ball will be used primarily outdoors, a more durable leather such as full-grain leather may be a better option. If the ball will be used indoors, synthetic leather may be a more practical choice.
It’s also important to consider the cost of the leather when making a decision. Full-grain leather is more expensive than synthetic leather, but it provides a higher quality and longer-lasting ball. Ultimately, the choice of leather will depend on the player’s personal preferences and the intended use of the ball.
Cutting the Leather
When making a basketball, cutting the leather is a crucial step that requires precision and accuracy. The leather is the most important part of the basketball, as it determines the ball’s grip, durability, and overall performance. Here are the two sub-sections that explain how to cut the leather:
Determining the Size
Before cutting the leather, it is important to determine the size of the basketball. The standard size of a basketball is 29.5 inches in circumference, but some players prefer a smaller or larger ball. The size of the basketball will determine the amount of leather needed for the ball.
To determine the size of the basketball, measure the circumference of the ball using a measuring tape. Once you have the circumference, divide it by pi (3.14) to get the diameter. The diameter will help you determine the size of the leather needed for the ball.
Creating the Pattern
Once you have determined the size of the basketball, you can create a pattern for cutting the leather. The pattern should be a circle with a diameter that is slightly larger than the diameter of the ball. This will allow for some excess leather that can be trimmed later on.
To create the pattern, trace a circle onto a piece of paper using a compass or a round object. Cut out the circle and place it onto the leather. Trace around the circle with a pencil or a marker, making sure to keep the circle centered on the leather.
After tracing the circle, cut out the leather using a sharp knife or a pair of scissors. Make sure to cut along the line as accurately as possible to ensure that the leather fits the ball perfectly. Once the leather has been cut, it can be stitched together to form the basketball.
Overall, cutting the leather is a crucial step in making a basketball. By following these steps, you can ensure that the leather is cut accurately and precisely, resulting in a high-quality basketball.
Stitching the Panels Together
Starting the Stitching
To start stitching the panels of the basketball together, the first step is to align the panels properly. Make sure that the panels are facing the right way and that they are in the correct order. Once the panels are aligned, thread the needle with a strong thread and knot the end.
Next, insert the needle through the first hole in the panel. Pull the thread through until the knot is snug against the panel. Then, insert the needle through the next hole in the panel and pull the thread through. Continue stitching in this way until you reach the end of the panel.
Securing the Panels
After stitching the first panel, align the second panel and start stitching it to the first panel. Make sure that the panels are tightly aligned and that the stitching is neat and even. When you reach the end of the second panel, tie a knot and cut the thread.
Repeat this process for all of the remaining panels until the basketball is complete. It’s important to make sure that the stitching is secure and that there are no gaps or loose threads. A well-stitched basketball will be durable and long-lasting.
In summary, stitching the panels together is a crucial step in the process of making a basketball. By following these steps and paying attention to detail, anyone can create a high-quality basketball that is perfect for playing on the court.
Inserting the Bladder
Inserting the bladder is an important step in making a basketball. The bladder is the innermost layer of the basketball, and it is responsible for holding the air that gives the ball its bounce. Here are the steps to follow when inserting the bladder:
- First, make sure that the bladder is the right size for the basketball. The bladder should fit snugly inside the ball without any gaps.
- Next, lubricate the bladder with a small amount of silicone spray. This will make it easier to insert the bladder into the ball.
- Insert the bladder into the ball through the valve opening. Make sure that the valve is open and that the bladder is oriented correctly.
- Once the bladder is inside the ball, inflate it to the desired pressure. Check the pressure with a gauge to ensure that it is within the recommended range.
- Close the valve and check the ball for any leaks. If there are any leaks, deflate the ball and re-insert the bladder.
By following these steps, you can ensure that the bladder is inserted correctly and that the basketball will have the proper bounce.
Inflating the Basketball
Once the basketball has been assembled, the next step is inflating it. This is a crucial step as it determines the ball’s bounce and feel during play. Here are the steps to follow:
- Locate the air valve on the ball. It is usually located near the top of the ball and has a small plastic cap covering it.
- Remove the plastic cap from the air valve.
- Insert the needle of the pump into the air valve. Make sure it is secure and tightly in place.
- Begin pumping air into the ball. Keep an eye on the pressure gauge to ensure you are inflating the ball to the correct pressure level. Most basketballs have a recommended pressure range of 7.5 to 8.5 PSI.
- Once the ball has reached the recommended pressure, remove the needle from the air valve and replace the plastic cap.
- Test the ball’s bounce and feel to ensure it is inflated to the desired level. If it is too firm or too soft, you may need to adjust the pressure accordingly.
It is important to note that over-inflating or under-inflating the basketball can affect its performance and durability. Therefore, it is recommended to use a pressure gauge to ensure the ball is inflated to the correct pressure level.
Testing the Basketball
Once the basketball has been fully constructed, it is important to test it to ensure that it meets the necessary standards. Testing the basketball involves checking various factors such as its weight, size, and bounce.
One of the most important tests is the bounce test. This test involves dropping the basketball from a height of 6 feet onto a hard surface and measuring the height of the bounce. The ball should bounce between 49 and 54 inches. If the ball bounces too high or too low, it may not meet the necessary standards and may need to be adjusted.
Another important test is the weight test. The basketball should weigh between 20 and 22 ounces. If the basketball is too heavy or too light, it may not be suitable for use in official games.
In addition to these tests, the basketball should also be visually inspected for any defects or irregularities. The surface of the ball should be smooth and free from any cracks or deformities.
Once the basketball has passed all of the necessary tests, it can be deemed suitable for use in official games. Testing the basketball is an important step in ensuring that it meets the necessary standards and will provide a fair and enjoyable game for all players involved.
Conclusion
In conclusion, making a basketball is a relatively straightforward process that requires a few key materials and some basic tools. While it may seem daunting at first, with the right guidance and a bit of patience, anyone can make their own basketball.
One important thing to keep in mind is that the quality of the materials used will have a significant impact on the final product. Using high-quality rubber and durable thread will help ensure that the basketball lasts for a long time and can withstand regular use.
Another important consideration is the size and weight of the basketball. It’s important to choose the right size and weight based on the intended use of the ball, whether it’s for recreational play or competitive games.
Overall, making a basketball can be a fun and rewarding experience that allows you to customize your ball to your preferences. With the right materials and tools, anyone can create a high-quality basketball that will provide hours of enjoyment on the court.


